Download and Install Official IT@School Ubuntu Latest Version for Kerala Students LP, UP, High School and Higher Secondary along with Windows 10

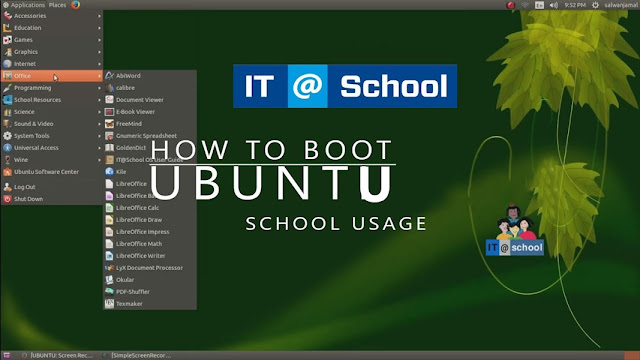
IT@School Ubuntu is an Official Linux based operating system developed for students in Kerala by the Kerala Government. It has all software for classes 1 to 12 in Kerala and will be useful for all students. It is a free software and everyone can download and install the OS for free. In this page you will get the download links for Edubuntu version prepared by IT@School of Kerala Government.
Download Ubuntu 18.04 by IT@School
Direct Download Link [ Edubuntu 18.04 IT@School ]
Download Resources [ IT@School Edubuntu Resources ]
OR Download from Official website KITE Downloads
KITE ( Kerala Infrastructure and Technology for Education , formerly IT@School Project ) Prepares software and infrastructure for Education in Kerala.
Installing Edubuntu 18.04 Prepared by KITE (IT@School)
You can easily Install EdUbuntu 18.04 by IT@School very easily as you install official Ubuntu OS. I have written an installation guide on Installing Ubuntu along with your Windows 10. Here also you can follow the same steps to install Edubuntu 18.04. Detailed steps are provided below.
Install Standalone Edubuntu 18.04 KITE (IT@School)
You can follow these steps to Install only the Edubuntu 18.04 in your computer or laptop. If you want to install a fresh copy of Ubuntu by erasing all files in your hard disk and Windows.
Download Edubuntu 18.04 ISO file from the link provided above.
1. Create a DVD by burning the ISO file or create a bootable USB drive. You can use Universal USB Installer for creating a bootable USB drive.
1. Create a DVD by burning the ISO file or create a bootable USB drive. You can use Universal USB Installer for creating a bootable USB drive.
You can disable your Internet connection before you restart. otherwise during installation Ubuntu will download some updates and the installation time will increase
2. Restart your PC/Computer. If you are using a DVD drive to install Edubuntu it will directly boot into Ubuntu installation window. If you are using USB Drive you have to configure your first boot device as USB drive or Press f10 (old PC) or f9(HP Laptops) to get into boot device. Some motherboard doesn't support the boot option menu. In that case you have to change the USB drive as your first boot.
3. Select Install Ubuntu option to directly install or 'Try Ubuntu' to try Ubuntu before you install it on your Computer.
4. In the next Window select the language. In this case we select English as the language
5. In the Next Window select the Keyboard layout. Here we select English US Keyboard
6. If you disable your Internet connection next window will appear. Just select next
7. In the next step use Normal Installation
8. If you want to install a fresh copy of Ubuntu Select Erase disk and Install Ubuntu ( You will lose all data )
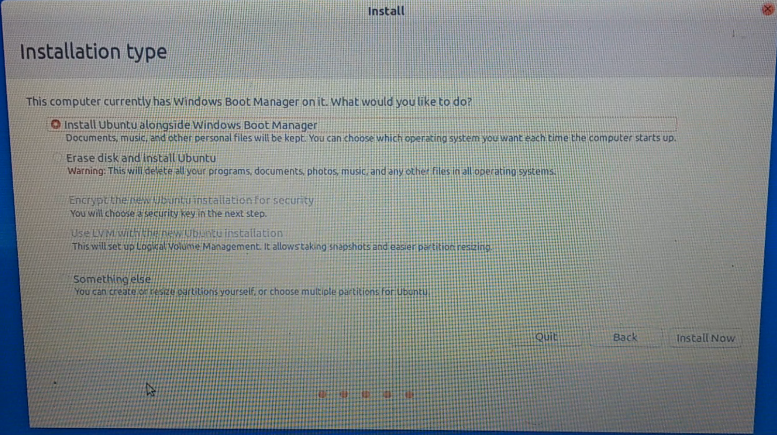
If you want to install Ubuntu Along With Windows 7/8/10 follow these steps
9. The Installation will start. After completion of installation it will ask you to reboot. Before reboot remove the DVD drive or USB drive.
Select Install Ubuntu from the menu
Install Ubuntu IT@School Along With Windows 7/8/10
You can install this Ubuntu 18.04 along with Windows 7/8/10 either in Legacy mode or UEFI Mode. If your Windows 10 is installed as UEFI Mode you have to install Ubuntu in UEFI Mode. Or if you installed Windows 7/8/10 in Legacy mode Ubuntu will be installed in Legacy mode.
1. Download Edubuntu IT@School
2. Create a DVD Drive or USB Bootable drive
You can burn a DVD or use USB drive. To boot Edubuntu from USB drive you have to install Universal USB Installer.
Open the setup file and select Ubuntu from the list. Check the box to show all ISO files. Browse files and select the downloaded ISO file of IT@School Edubuntu. Select the USB drive letter and press create button.
It will take some time to write the files in USB Drive. The image of Universal USB Installer is shown below.
3 - Create a Free space of Ubuntu
Before installing Ubuntu along with your Windows 7/8/10 you have to create free space for Ubuntu. You can use Windows disk manager to create a free space or use any third party software like Mini tool partition wizard.
Windows Disk Manager : You can open Windows Disk Manager by Searching for Computer Management from the start menu. Or right click on your PC icon from desktop and select Manage. It will open and select Disk Management from the menu as shown in picture.
It will display whole Hard Disk Drives attached to your computer/Laptop. Right click on a partition and select shrink volume. ( Do not create large number of primary partitions.)
It will open new window. Type the amount of space you are going to allocate for Ubuntu in MB. At least 30000 MB (30GB) is required for IT@School Ubuntu Installation. You can increase the space as per your needs.
After pressing the shrink button it will take some time to shrink the volume. After shrinking the new space will be seen in black colour. This is where you are going to install IT@School Ubuntu 18.04
Troubleshooting : If you failed to shrink volume follow these steps. Open Command Prompt as administrator.
And run the command chkdsk /r and press enter. It will ask to check for errors in the next reboot. Press y and enter.
UEFI Boot Configuration
For newer PC Windows is installed in UEFI format. In this case you have to install IT@School Ubuntu in UEFI format.
Restart your computer and open boot configurations.
Make sure USB Boot is enabled.
Disable Legacy support
If there is an option for first boot device change it to USB Drive ( In case of HP Laptops use F9 key to boot from USB Drive, For Sony VAIO Laptop use Assist key and select Boot from USB )
 |
| UEFI Boot configuration Newer Laptop |
Save your settings and Restart
Boot from your USB drive
In case of HP Laptops use F9 key to boot from USB Drive, For Sony VAIO Laptop use Assist key and select Boot from USB.
If you have already configured first boot device as USB drive it will automatically boot from USB Drive.
 |
| Boot menu HP Laptop |
Installing IT@School Ubuntu
According to the Legacy mode or UEFI mode the options visible to you will be different.
 |
| UEFI Boot Menu |
 |
| Select English as Language and press Continue |
 |
| Keyboard Layout English US |
 |
| No need to select Network. Internet connection increases installation time |
 |
| Normal Installation in Updates |
 |
| Select Install along with Windows. This Option will be only visible if you have successfully created a Free space from Windows Disk Manager |
 |
| New popup will appear showing you more about installation location. Click Continue |
 |
| Select Location as India |
 |
| Your Installation now begins |
You have successfully installed Edubuntu by KITE (IT@School) along with Windows. It will automatically add Windows boot entry to the menu. You can either boot into Ubuntu or Windows as per your need.
Troubleshooting
Having any Issues while installing Ubuntu comment below with your issue. We will try to solve your issues.


My New Dell laptop is pre-loaded with Ubuntu 18.04 OS
ReplyDeleteI would like to download the IT@School software only.
Please advise how can I do it.
Thank you
Download resources file from https://kite.kerala.gov.in/KITE/index.php/welcome/downloads and install in your Ubuntu 18.04
Deletethanks
I have installed IT@School ubuntu as you have mentioned in the 30 gb unallocated space, the problem now is system is not showing grub/ option to choose os
ReplyDeletei installed ubuntu 18.04 . can i change it in to it@school ubuntu
ReplyDeleteDownload resources file from https://kite.kerala.gov.in/KITE/index.php/welcome/downloads and install in your Ubuntu 18.04
ReplyDeletethanks
Thank you very very very much..... Thanks... Lot of thanks
ReplyDeleteI installed Ubuntu 20.4. can I install resource file in ubuntu 20.4
ReplyDeleteCan i install it@ schol ubuntu in my coconics laptop with ubuntu software. Please reply
ReplyDeleteNICE
ReplyDelete